REVIEW · AMSTERDAM
Amsterdam: Traditional Dutch Syrup Waffle Making Workshop
Book on GetYourGuide →Operated by We Are Amsterdam · Bookable on GetYourGuide
Caramel smell beats waiting in line. This 45-minute Amsterdam workshop puts you at the iron for hands-on stroopwafels, and you leave with an XL waffle plus a take-home extra. I also love the way the hosts mix technique with actual context, so you’re not just following steps. One possible drawback: the room setup can get tight, and if you sit at the back you might strain to hear every instruction.
You’ll gather in a home-style workshop behind the market area, start with an intro to the stroopwafel (including how it’s been loved since the 18th century), then get your apron on and cook. The pace is fast enough to feel fun, slow enough to actually learn.
In This Review
- What Makes This Workshop Worth Your 45 Minutes
- Key Points I’d Plan Around
- Entering the Workshop Near Albert Cuyp Market
- What You Do During the Workshop (A Step-by-Step 45 Minutes)
- 1) Welcome, aprons on, and the stroopwafel story
- 2) Watching the basics: mixing and the iron technique
- 3) Your turn: roll, cook, and get the layers right
- 4) The key move: drizzle the warm stroop and seal it
- 5) Coffee or tea break, first bite, and mingling
- 6) Pack the XL stroopwafel to take home
- The Host Makes or Breaks It (And Here, They Usually Deliver)
- Price and Value: Is $23 a Good Deal for Amsterdam?
- Practical Tips So Your Waffle Comes Out Right
- Who This Stroopwafel Workshop Fits Best
- Should You Book This Stroopwafel Workshop?
- FAQ
- How long is the Amsterdam stroopwafel workshop?
- What does it cost?
- Will I get coffee or tea with the workshop?
- Can I take stroopwafels home?
- Is the instructor teaching in English?
- Is this workshop suitable for wheelchair users?
- Where do I meet for the workshop?
- Do I need any baking experience?
What Makes This Workshop Worth Your 45 Minutes
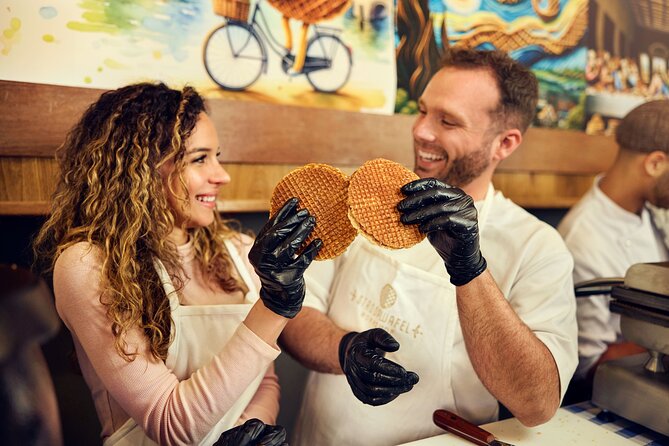
This is not a giant show. It’s a practical, guided session built around a very specific goal: make stroopwafels with the right texture—thin waffle layers, filled with warm syrup, cooked until crisp. That focus matters, because stroopwafel success is mostly about timing and heat control, not fancy ingredients.
And you get real payoff: you eat one fresh during the break with a hot drink, and you pack one XL stroopwafel to take home. Plus, you’ll get a certificate (and in many sessions you may also receive small branded extras like a sticker and bag). At around $23, you’re paying for a guided food lesson plus materials, not just for a snack.
Key Points I’d Plan Around

- You cook on traditional irons: rolling, cooking, and syrup assembly are part of your turn, not a demonstration-only moment.
- XL stroopwafels with a take-home extra: you’re leaving with more than a bite-sized souvenir.
- History is built in, not tacked on: the session includes the stroopwafel’s roots since the 18th century.
- Coffee or tea time is part of the flow: you cool down, chat, and eat your first real bite while it’s at its best.
- English instruction and friendly hosts: many recent instructors (like Vince, Julia, Lisa, Jay, Franziska, and Roza) are noted for clear, upbeat guidance.
- Small-room reality: if your group is larger, you might wait a bit for the iron, and sound can be tricky from the back.
A few more Amsterdam tours and experiences worth a look



Entering the Workshop Near Albert Cuyp Market
The meeting point is easy in theory and tricky in practice, which is exactly what you’d expect in a busy market zone. The door opens about 5 minutes before your time slot, and you’ll want to arrive early—about 10 minutes—so you can get oriented and enjoy the Albert Cuyp Market area nearby.
This matters because the workshop sits behind the market stands. If you arrive right on time, you can burn minutes trying to locate the building while everyone else is already milling in. If you’re the type who likes calm starts, arrive early and let the market area do its thing for a bit.
If you’re driving, plan for parking to be the bottleneck, not the workshop itself. The advice is to arrive around 20 minutes early, since finding a spot nearby can take effort.
What You Do During the Workshop (A Step-by-Step 45 Minutes)

This is a focused class with a clear sequence. You’re in and out before your coffee runs cold—yet you still complete the full stroopwafel process.
1) Welcome, aprons on, and the stroopwafel story
You start with an intro from your host in English. The session covers the history and the traditional approach to making stroopwafels, including that it’s been a beloved Dutch treat since the 18th century.
Why this is useful: stroopwafel technique is easier to understand when you know what the cookie-and-syrup balance is supposed to do. You’re not just chasing a recipe—you’re learning what texture you’re aiming for and why.
2) Watching the basics: mixing and the iron technique
Next comes a demonstration. You’ll see how the dough is handled and how the traditional iron affects the waffle layers: golden tone, crisp edges, and the right thin structure so the syrup can fill without turning it into paste.
The best hosts in this format do two things well:
- they point out what matters most (timing and heat),
- and they translate what you’re looking at into what you should feel and do.
From recent sessions, hosts like Vince, Julia, Lisa, and Jay are repeatedly praised for clear step-by-step explanations and keeping the atmosphere light.






3) Your turn: roll, cook, and get the layers right
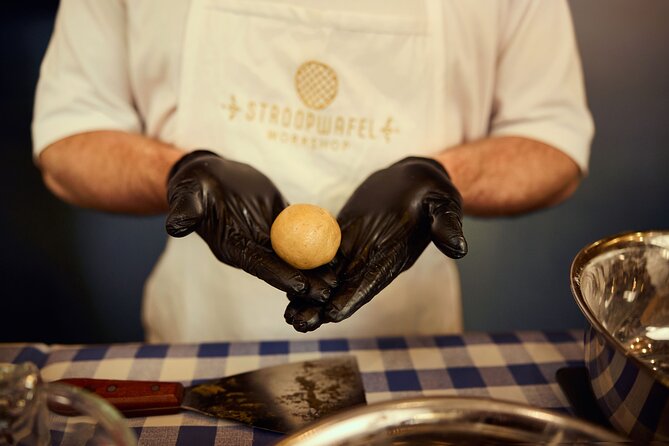
Now you get hands-on. You roll out the dough and cook it using the traditional iron. This part surprises people: it’s learnable even if you’ve never baked bread or cookies.
Your goal is to get layers that are cooked through but not dry. You want a waffle that snaps a little, but still gives when you bite into it.
One practical heads-up: in some classes the iron setup means you may share equipment and wait a moment between turns. It’s still quick, but if your group is big you might notice small pauses in workflow.
4) The key move: drizzle the warm stroop and seal it
This is the signature moment. You drizzle warm caramel syrup—the stroop—between the waffle layers, then seal the sandwich.
What makes this worth doing yourself is the sensory feedback. When it’s warm, the syrup flows and bonds properly. When it’s not, it gets stubborn and you lose that classic gooey-meets-crisp contrast.
5) Coffee or tea break, first bite, and mingling
While your stroopwafel cools, you get a break with coffee or tea. You’ll have time to sit, catch your breath, and chat with other participants.
Then you take your first bite right there—crisp yet tender, and best eaten warm. This is also when the workshop’s “social” side shows up. Many recent hosts are mentioned as walking around, checking in, and keeping conversation going without turning it into a stiff classroom.
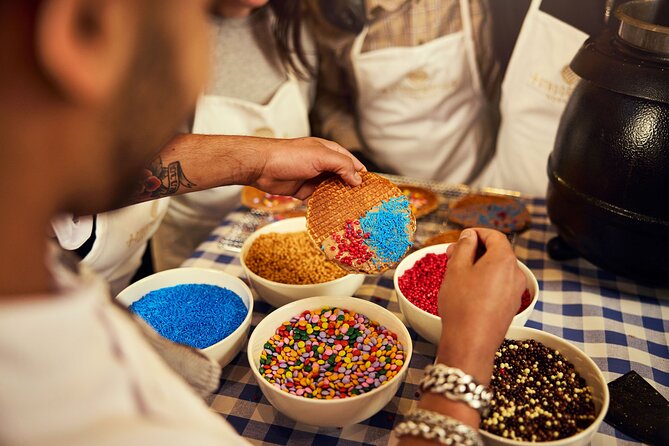
Some sessions also include small extras like decorations, and a few reviews note you can add toppings based on your taste. Don’t assume a full dessert bar, but you may find options beyond the core syrup and waffles.
6) Pack the XL stroopwafel to take home
At the end, you pack one stroopwafel to go. The class includes two XL stroopwafels total: one you eat during the workshop and one you take away.
That take-home part is the value play. You’re not just paying for a short lesson that ends when the timer stops. You get a souvenir you actually want to eat later—fresh enough to enjoy, thick enough to feel like more than a token bite.
The Host Makes or Breaks It (And Here, They Usually Deliver)

This workshop is built around instruction quality. And judging by the feedback patterns, the hosts consistently nail the essentials: friendly energy, clear directions, and enough attention that beginners don’t feel lost.
Names that show up often in recent experiences include Vince, Julia, Lisa, Jay, Franziska, Nikola, Morris, Jack, Nicola, Roza, and others. The common theme is that the class doesn’t feel rushed, and the guidance stays personal enough that you can keep up.
If you’re the kind of person who likes to understand what you’re doing, you’ll likely appreciate the mix of technique plus context. If you’re more hands-on, you’ll still have plenty to do because your role isn’t limited to watching.
Price and Value: Is $23 a Good Deal for Amsterdam?

At $23 per person for 45 minutes, the key question is what you’re really paying for. Here, the value comes from three things:
- Materials and an actual finished product: you use supplies, cook your own stroopwafel, and get two XL waffles in total.
- Instruction on a technique you can’t fake: the iron cooking and syrup timing are the hard parts, and the workshop teaches them.
- An experience you’ll eat twice: one at the table, one later at home.
Some people compare stroopwafels bought at markets and stalls, and the takeaway is that workshop pricing can feel justified when you factor in what you’re doing and how large the waffles are. In plain terms: this is paying for learning and for food you’ll actually finish.
Practical Tips So Your Waffle Comes Out Right
These are small details that help, based on what tends to make a hands-on class smoother:
- Arrive early enough to find the door: the workshop is behind market stands, and it’s easier to orient before you’re flustered.
- Use the apron and supplies provided: it’s part of the workflow, and it protects your clothes from syrup.
- Pay attention during the demonstration: the iron timing is where most beginners get tripped up.
- Eat your first bite while it’s warm: that crisp-tender balance is the whole point of stroopwafel.
- If you’re sensitive to sound, sit closer: one note from past sessions is that hearing can be tough from the back in a denser setup.
Who This Stroopwafel Workshop Fits Best

This is one of those activities that works for a lot of groups:
- Families with older kids and teens: it’s hands-on, not overly complicated, and you end with a tangible result.
- Couples: it’s social but not awkward, and the food makes a natural shared focus.
- Friend groups: you’ll rotate through roles on the iron and bond over what you’re making.
- Solo travelers: there’s built-in mingling during the coffee/tea break.
Two notes for matching expectations:
- It’s not suitable for wheelchair users, based on the activity guidance provided.
- It’s best for people who don’t mind a compact workspace and who enjoy cooking even if they’re beginners.
Should You Book This Stroopwafel Workshop?

If you want a short, authentic Amsterdam food activity where you actually make the thing—not just taste it—this is a strong pick. The biggest reasons to book are simple: you cook on traditional irons, you get two XL stroopwafels (one to take home), and the hosts are repeatedly praised for keeping the session friendly and well paced.
I’d skip it only if you have mobility needs that can’t work with a non-wheelchair setup, or if you know you’ll be frustrated by a tight space and potentially harder-to-hear instruction from farther back.
If you’re spending time around Albert Cuyp Market anyway, this slots nicely into your day. Book a time that gives you breathing room to arrive early, and go in curious. You’ll leave with a skill you can repeat and a stroopwafel you’ll want to eat again.
FAQ

How long is the Amsterdam stroopwafel workshop?
The workshop runs for 45 minutes.
What does it cost?
The price listed is $23 per person.
Will I get coffee or tea with the workshop?
Yes. Coffee or tea is included, and you also take a break to enjoy your drink while you cool your stroopwafels.
Can I take stroopwafels home?
Yes. The workshop includes 2 XL stroopwafels total: one is eaten during the session, and one can be taken home.
Is the instructor teaching in English?
Yes. The instructor speaks English.
Is this workshop suitable for wheelchair users?
No, the activity is not suitable for wheelchair users.
Where do I meet for the workshop?
The meeting point is the door of the workshop behind the market stands, and the door opens about 5 minutes before the start time. If you can’t find it, you should call the number written on your voucher.
Do I need any baking experience?
No prior baking experience is required. The workshop is designed for beginners, with clear guidance while you learn the steps.